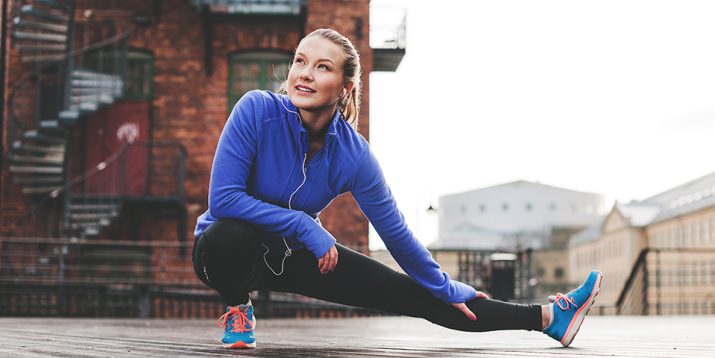
Yoga poses after your run can be very beneficial. Yoga and running make a perfect pair because yoga helps break up the repetitive motions of running that often lead to muscle imbalances, pain, and even injury.
Running is a great cardio workout that can help you lose weight, keep your ticker strong, and boost fitness.
But if your usual M.O. involves going right from your run to the shower, you’re missing a key step that can keep you running and feeling your best for the long haul: a quick, post-run yoga routine.
Read on to discover the many benefits of yoga for runners. Plus, the seven best yoga poses for post-run recovery.

Are Yoga Poses After Running Good for Recovery?
“Yoga really helps with full-body engagement and creates a strong sense of balance from head to toe,” says yoga teacher Jennifer Fuller.
For example, if you typically use more quad than hamstring in each running stride, yoga can help you slow down and focus on building up strength in lagging muscle groups.
Balancing out those leg muscles can help prevent running-related aches and pains.
Plus, you’ll build strength in small-yet-important muscles that play an essential role in moving you forward (like those in your feet and calves), as well as postural muscles that keep you upright.
Yoga also relieves the repetitive stress that running can place on your spine and joints.
“Sometimes, back pain can be an issue from that constant pounding of the pavement,” Fuller says. “Twisting or forward fold or doing backbends can really open up the spine, giving the discs more room.”
All of these perks make yoga the perfect post-workout recovery option for runners.
7 Essential Yoga Poses for Runners
Give your hard-working muscles some relief with these asanas. String them together and you’ve got an effective recovery routine that only takes 15 minutes.
Do these poses after your run, or at least twice per week, Fuller says.
Looking for more? Start your yoga practice in the comfort of your living room with Yoga52, a comprehensive online yoga program that complements your running habit.
1. Toe stretch
According to Fuller, this pose stretches out the areas that make up the foundation of your running stride: your toes and the arches of your feet.
- Kneel on the floor with your knees together. Place a cushion or folded blanket under your knees for support, if needed.
- Tuck your toes and sit back on your heels. Try to keep your knees on the floor.
- Hold for 30 seconds, or for as long as you can manage. Repeat for 3 sets total.
2. Downward dog
This classic yoga pose stretches your calves, hamstrings, and glutes while strengthening your upper body and core.
- Get down on all fours with your hands directly under your shoulders.
- Tuck your toes, push into the ground with your hands and lift your hips toward the ceiling to straighten your legs. You may find that keeping a micro-bend in your knees to lift your sit bones will help deepen the stretch in your hamstrings.
- Continue pressing your hands into the floor, your hips back, and your heels toward the ground to intensify the stretch.
- Hold for 60 seconds.
3. Low lunge

“The low lunge stretches the hip flexors, glutes, and quads, and strengthens the lower legs and feet,” Fuller says.
- From downward dog, shift into a high plank and step your right foot forward between your hands.
- Lower your left knee to the floor and untuck your toes so the top of your left foot is flat on the floor.
- Lift your chest and sink your hips as low as is comfortable. Slide your left knee back if you need more of a stretch.
- Keeping both hips level, sweep your arms toward the ceiling, and lift your chest. Try to sink your hips deeper toward your front heel.
- Hold for 60 seconds before switching sides.
4. Pigeon pose

Like the low lunge, pigeon pose stretches the hip flexors, quads, hamstrings, and glutes. “But there’s no strengthening in this move, it’s more of an active stretch that’s good for reducing back pain,” Fuller says.
- From downward dog, bend your right knee and bring it behind your right wrist.
- Slide your right ankle toward your left wrist, so your right shin crosses your mat at a comfortable angle.
- Slowly lower your hips to the floor, keeping them level throughout the stretch. The top of your left foot should be flat on the floor.
- Once you’ve found your ideal position, walk your hands forward to fold your upper body over your front leg.
- Hold for 60 seconds before switching sides.
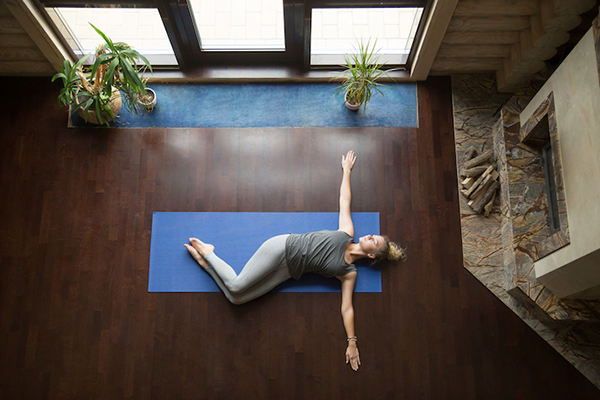
5. Supine twist
This pose stretches the back, glutes, core, and outer hips. “It also creates space through the spine, which is great for low back discomfort,” Fuller says.
- Lie flat on your back with your legs extended, and open your arms into a “T.” Hug your knees in toward your chest.
- Keeping both shoulders on the floor, lower your knees toward the floor to your right. Slowly turn your head to the left.
- Breathe slowly in and out and hold for 60 seconds. Switch sides.
6. Tree pose
This standing pose strengthens the ankles, feet, and shin muscles, while building balance and focus.
- Stand tall with your big toes touching, heels slightly apart. Shift your weight onto your left foot, and raise your right knee.
- Open your right knee out to your right and place the sole of your right foot against the inside of your left calf or thigh. (Don’t place your foot against your knee.)
- Keep your left knee supple as you balance. When you’re ready, bring your hands together in front of your heart, overhead, or straight out to your sides.
- Balance for 60 seconds, then switch legs and repeat.
7. Triangle pose
This pose links together everything you’ve done so far: stretching the legs, hips, and ankles, while strengthening the legs, abs, and back, and practicing balance, Fuller says.
- Stand tall with your big toes touching, heels slightly apart.
- Step your left foot back 3 to 4 feet, planting your left foot at a 45-degree angle, with your right toes pointed toward the top of your mat.
- Rotate your torso to your left, extending your arms to form a “T.”
- Straighten both legs and hinge at your hip to shift your torso over your right leg without bending at your waist.
- Touch your right hand to the floor or a block, and reach your left hand toward the ceiling, letting your gaze follow.
- Breathe slowly in and out. Hold for 60 seconds before switching sides.
From the Beachbody On Demand Blog –


